 Luxury vinyl tile is a popular choice for Do-It-Yourselfers (DIY) because it’s quick and easy to install. It’s important that you properly prepare your subfloor before putting down LVT. An uneven or not level subfloor could lead to an unsightly mess instead of a beautiful new floor.
In this article, we’ll primarily be discussing how to prepare plywood subfloors for LVT, but at the end we’ll touch on a few points for preparing concrete subfloors too.
Clean, Dry, and Structurally Sound
The first requirement for installing luxury vinyl tiles is the plywood subfloor must be clean and dry as well as structurally sound. To help keep the floors dry and sound, there should be at least 18” of well-ventilated space underneath the plywood subfloor.
A plywood subfloor that’s installed directly onto concrete or without enough airspace under it will absorb moisture. Putting LVT on top of that floor will trap the moisture and speed up wood rot in the plywood. Plywood subfloors need adequate ventilation underneath and should not be exposed to moisture from the concrete slab or ground.
Smooth, Flat, and Free of Gaps
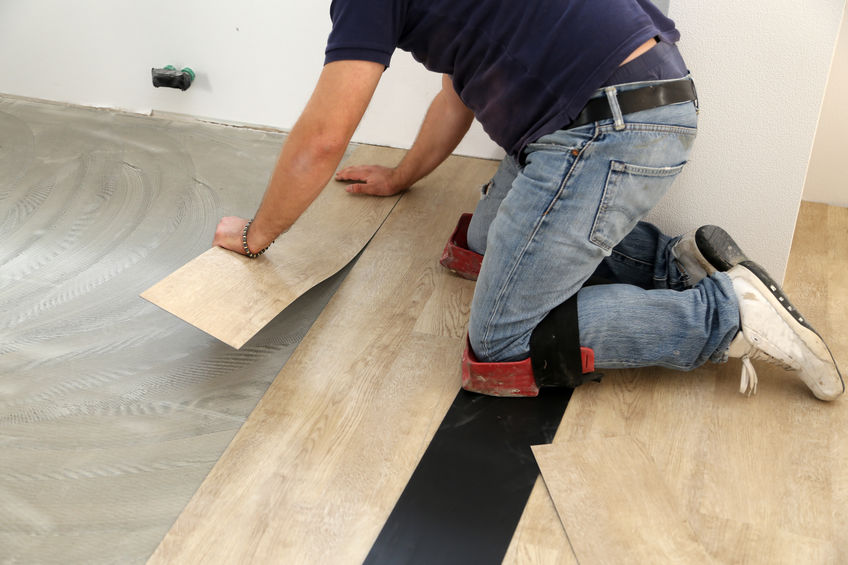
Luxury vinyl tile flooring follows the subfloor profile, if the subfloor has bumps and dips in it, the LVT will too. Before installing the tiles, you need to make sure the subfloor is smooth, flat, and free of large gaps—less than 1/2 inch is OK, but any gaps wider than that need to repaired.
You subfloor needs to be flat and level; one manufacture recommends no more than 3/16” variation over a ten foot span. You should fix low spots and gaps with floor patch or self-leveling compound. Pre-mixed floor patch and floor leveler can be easily applied following the manufacturer’s instructions. The floor patch must dry completely before installing the LVT. If the subfloor has many gaps and low spots, you may want to apply a coating of self-leveling compound over the entire surface.
Secure any plywood subflooring that’s raised or loose with wood screws before installation of flooring. If there are high bumps or rough areas, they can be smoothed with a belt sander.
Consider Adding Underlayment
After you’ve corrected all the major flaws in your subfloor, it may still not be smooth and gap-free. If you want a better surface for your luxury vinyl tiles to rest on, consider adding vinyl underlayment over the plywood subfloor.
An underlayment can provide a smooth surface for your LVT while also increasing insulation and acting as a moisture barrier. Different types of underlayment work better with different LVTs, so be sure to use the underlayment recommended by the manufacturer of your flooring.
Tiles adhere to the underlayment, but the underlayment is not bonded to the subfloor with adhesive. This creates a “floating” floor that can expand and contract, so it’s important to leave about 1/4 inch gap between the LVT and the walls.
What About Concrete?
Luxury vinyl tiles can be installed directly onto a concrete slab but moisture is a concern. The concrete itself must be completely set and dried, which may take up to six weeks after pouring. Before LVT install the concrete must be permanently dry, not getting damp after heavy rain or other wet conditions.
As with a plywood subfloor, the concrete subfloor must be clean and flat. Cracks, holes, and joints must be filled and smoothed before installing the LVT.
Conclusion
DIYers love luxury vinyl tiles because they are quick and easy to install, but it’s important to make sure the subfloor is properly prepared. With a strong foundation under it, your LVT flooring will look better and last longer—and isn’t that worth investing a little extra time?